Bioswale installation is one of the most cost-effective ways to manage stormwater, improve drainage, and add value to your landscape-all while complying with stricter environmental rules in 2024. If you’re confused about costs, technical requirements, and what can realistically go wrong, this guide breaks down the facts and gives you a complete, actionable roadmap.
Key Takeaways
- Bioswale installation costs $5.50–$24 per square foot, making it less expensive than rain gardens while offering low annual maintenance.
- The main user complaints are clogs, weeds, standing water, and maintenance burdens-often caused by poor design or neglect.
- Permitting is generally straightforward, but federal stormwater rules apply everywhere. Plant selection and regular upkeep are non-negotiable for success.
- What is bioswale installation and why is it important?
- How to install a bioswale: Step-by-step
- Advanced analysis and common pitfalls
- Conclusion
- Frequently asked questions
What is bioswale installation and why is it important?
A bioswale is a vegetated, shallow channel engineered to direct, filter, and absorb rainwater runoff before it enters storm drains or causes flooding. Bioswale installation is a preferred solution for both residential yards and commercial lots because it treats polluted water naturally, reduces local flooding, and often meets city or federal stormwater requirements.

The driving reason behind bioswale installation in 2024 is tightening regulations like the NPDES MS4 permit program, which requires municipalities (and, by extension, homeowners and developers) to reduce polluted runoff using low-impact infrastructure. Unlike French drains or standard grading, properly installed bioswales use living plants and engineered soils to slow, filter, and soak up water while providing habitat-if maintained well.
Bioswale installation is also less disruptive than traditional regrading, and it can deliver decades of function for properties where rain gardens or retention ponds aren’t feasible. When coupled with drought tolerant landscaping or smart irrigation, they further reduce watering needs and ongoing costs.
Want more inspiration? Explore sustainable permeable paver patio ideas for maximizing stormwater capture in your landscape.
How to install a bioswale: Step-by-step
- Site Assessment. Identify low points and typical water flow on your property. Take measurements for the area where a bioswale could collect and divert runoff—ideally away from foundations and toward a safe outflow or rain garden (see our rain garden guide for complementary ideas).
- Planning & Design. Sketch your swale, specifying length, width (usually 9 to 16 feet), depth, and slope (gentle, around 2–5 percent, to prevent erosion and allow infiltration). Research local requirements or ask your city about stormwater rules. At this stage, factor in design, engineering, and permitting: for most homeowners, expect total project costs of $2,000 to $10,000 for small lots (source: ProLandscapes MD).
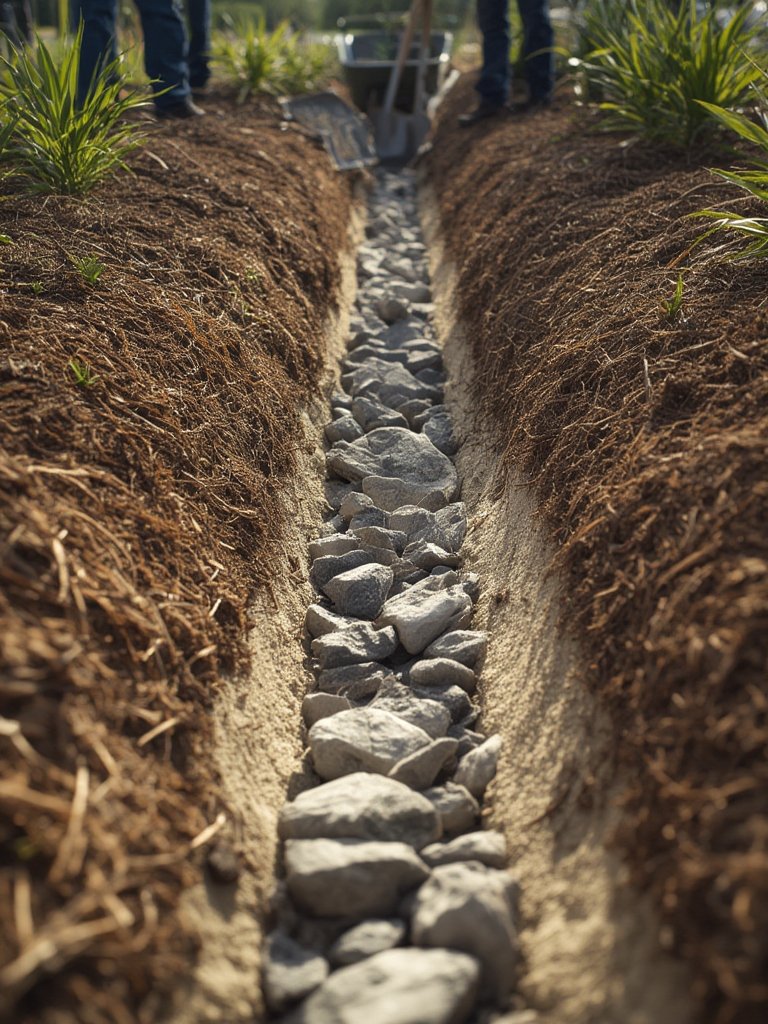
- Excavation & Grading. Dig out the channel to your planned dimensions, correcting slopes as needed. Shape the bottom for even water flow and gentle sides for safety and plant growth. Remove large rocks or construction debris.
- Soil Amendments & Drainage Layer. For best infiltration, amend compacted or clay soils with sand, compost, or specially engineered bioswale mix. In very wet or clay-heavy sites, consider adding a gravel layer at the bottom for improved drainage (especially in commercial or heavy traffic areas).
- Install Check Dams & Flow Control. Place rocks, logs, or level spreaders across the length to slow water and prevent channel erosion. This step is often skipped in DIY builds but makes a huge difference in function and maintenance requirements.
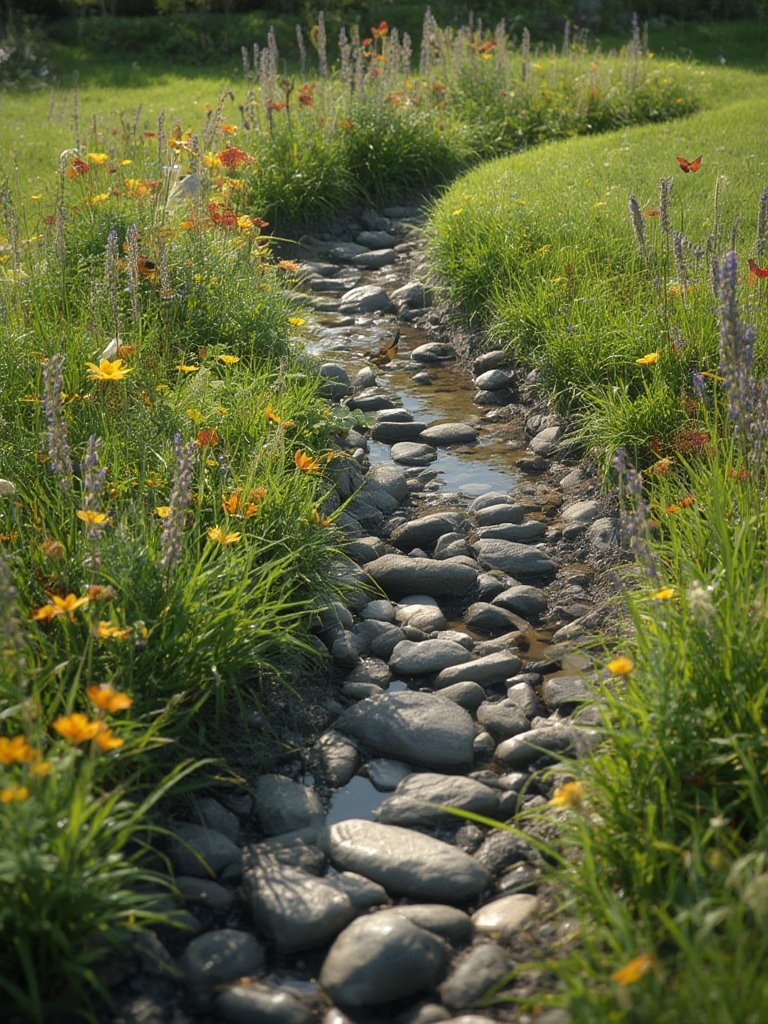
- Plant Selection & Layout. Choose a mix of resilient native plants and tough grasses (sedge, rush, blue flag iris, or local wildflowers). Stagger plants in dense groupings for better water filtration and fewer weeds. Always select varieties matched to your regional climate and moisture levels, as plant survival drives long-term success and lower costs (NOAA Digital Coast).
- Mulch & Final Touches. Cover exposed soil with clean mulch or small river rocks to prevent erosion and suppress weeds. Add clear access points for inspection and maintenance. Confirm that stormwater enters, passes through, and exits the swale without bypassing.
- Regular Inspection & Maintenance. Trim, weed, and remove debris at least twice a year, with extra checks after major storms. Monitor flow paths and replant gaps as needed. For easier seasonal pruning jobs, consider a reliable mini chainsaw for garden cleanup.
- Pro Tip: Always call utility location services before digging, and photograph each stage for permitting and future troubleshooting.
- Hacks & Tricks: Install landscape fabric only under rock-based flow paths, not under plantings. This prevents root suffocation and helps plants thrive, but still blocks sediment in critical splash zones.
For efficient plant layout and ongoing pruning, upgrade your tools with sharp bypass pruning shears. And if your swale spans a long area, a retractable garden hose reel can make seasonal watering fast and tidy.
Advanced analysis and common pitfalls
Even with well-planned bioswale installation, several real-world problems can undermine your investment. Here’s what users and city maintenance teams report most often:
- Pipe or Inlet Clogging. Leaves, litter, sediment, and roots easily block pipes or inlets, causing water to pool or overflow around the swale rather than through it.
- Weed Invasion & Poor Plant Survival. Under-spec’d or mismatched plants (especially if not native) struggle, leading to bare soil and invasive species taking over. This triggers more weeding, higher costs, and aesthetic complaints.
- Standing Water & Mosquitoes. Improper grading or compacted soils stop water from draining within 48 hours-turning swales into stagnant pools.
- Maintenance Overload. Designs with steep sides, inaccessible location, or complex curves frustrate owners as regular cleaning and plant care become a burden, not a benefit (source: EngineerGirl).
- Neglect Escalates Costs. Unchecked bioswales lead to neighborhood complaints, higher inspection costs, regulatory fines, or full replacement-a real issue in large installations (Sustainability Directory).
| Stormwater Solution | Installation Cost | Annual Maintenance Cost | Typical Lifespan | Key Drawbacks |
|---|---|---|---|---|
| Bioswale | $5.50–$24/sq ft $58/linear ft | $0.06–$0.21/sq ft $4.31/linear ft | 20–30 years | Clogging, weeds, plant loss |
| Rain Garden | $40/sq ft (plus tests) | $4/sq ft | 20–30 years | Expensive soil prep, high annual care |
| Tree Planting | $3–$14/sq ft $13–$288/tree | $15–$81/tree | 20–35 years | Slow effect, individual attention |
Source: NOAA Digital Coast
Most technical specifications (such as slope, depth, or plant lists) are dictated by local codes or site specifics. But overarching requirements-twice-yearly inspections, post-storm clearing, and adherence to NPDES MS4 permit rules-apply everywhere. Homeowners and pros should review current federal guidelines for compliance details.
For even more reliable outcomes, invest time in plant selection matched to your climate and plan for hands-on care, especially in the swale’s first two years. No matter how affordable bioswale installation starts, neglect almost always multiplies long-term costs.
Conclusion
Bioswale installation is a proven, affordable way to solve urban and residential drainage challenges—if owners plan ahead, pick the right plants, and commit to straightforward maintenance. It remains more budget-friendly than many stormwater options, but you must weigh ongoing care, regulatory compliance, and realistic climate challenges. If you want a sustainable solution that upgrades curb appeal and stormwater performance, invest in a properly designed bioswale. Ready to improve your landscape? Start your bioswale installation project today and transform runoff hassles into long-term assets.
Frequently asked questions
How much does bioswale installation actually cost for a typical home?
For most residential yards, bioswale installation costs $2,000–$10,000 total. The price per square foot ranges from $5.50 to $24, depending on soil conditions, design complexity, and local labor rates. Expect to pay more for advanced features or larger swales.
How does bioswale maintenance compare to rain gardens?
Bioswale maintenance is generally cheaper, costing $0.06–$0.21 per square foot annually. Rain gardens cost about $4 per square foot per year for tests and upkeep. Swales mainly require seasonal pruning, weeding, trash removal, and clearing of flow pathways.
Do bioswales add property value or qualify for insurance discounts?
No direct statistics are available to prove bioswales increase property value or lower insurance. However, they may help avoid water damage and compliance issues, plus reduce overall stormwater management expenses—a potential selling point.
What plants work best in a drainage swale?
Choose tough, regionally appropriate natives-such as sedges, rushes, blue flag iris, or wildflowers. Survival rates depend on matching plants to local rainfall patterns and occasional flooding. Visit local nurseries or check with your extension office for lists.
Do I need a permit for bioswale installation?
You may. Permits are often included in quoted costs, but most areas in the US require compliance with federal NPDES MS4 stormwater permits. Always check with your city or county before starting earthwork or changing water flow patterns.